openlayers地图打印
目录
一、引言
系统地图打印是比较常用的功能,因为经常会把当前的视图作为图片保存,用于方便自己或者他人查看当前地图的情况,截图效果不是很好,直接使用openlayers官网例子。
二、地图打印实现
上代码,主要核心代码是在最后点击事件中
<!DOCTYPE html>
<html lang="en">
<head>
    <meta charset="UTF-8">
    <title>Title</title>
    <link rel="stylesheet" href="js/ol.css">
    <script src="js/ol-debug.js"></script>
    <script src="lib/jquery/jquery-3.3.1.min.js"></script>
    <script src="lib/bootstrap/js/bootstrap.js"></script>
    <link rel="stylesheet" href="lib/bootstrap/css/bootstrap.css">
    <script src="https://cdnjs.cloudflare.com/ajax/libs/FileSaver.js/1.3.3/FileSaver.min.js"></script>
    <style>
        .pop {
            width: 70px;
            height: 20px;
            /*            border: 1px solid #088;
                        border-radius: 10px;*/
            background-color: #0FF;
            opacity: 0.7;
        }
    </style>
</head>
<body>
<div class="pop" style="display: none;">123</div>
<div id="map" style="width: 100%">
    <div style="position: absolute;left: 100px; z-index: 10">
        <button id="bt_print" >打印</button>
    </div>
</div>
<script>
    var webip="http://localhost:";
    var gisip="http://localhost:";
    var webport="8080/";
    var gisport="8080/";
    /*********************************************************地图初始化**********************************************************/
    /*底图初始化*/
    var format = 'image/png';
    //view
    var view=new ol.View({
        // 设置成都为地图中心
        center: ol.proj.transform([508881,299705],"EPSG:3857","EPSG:3857"),
        zoom: 18
    });
    //var osm=new ol.layer.Tile({source: new ol.source.OSM()});
    var tilePolyline = new ol.layer.Tile({
        //visible: false,
        source: new ol.source.TileWMS({
            url: 'http://localhost:8080/geoserver/whuxcy/wms',
            params: {'FORMAT': format,
                'VERSION': '1.1.1',
                tiled: true,
                "STYLES": '',
                "LAYERS": 'whuxcy:polyline'
                //"exceptions": 'application/vnd.ogc.se_inimage',
                //tilesOrigin: 8176078.237520734 + "," + 704818.0275364731
            },
            crossOrigin: 'anonymous'
        })
    });
    /*矢量图层初始化*/
    /////////////////////////////////////
    var polygonTypename="xcy:pgpolygon";
    var polygonVectorSource = new ol.source.Vector({
        features:[]
    });
    var polygonVectorLayer = new ol.layer.Vector({
        title:"面",
        source: polygonVectorSource,
        style: styleFunction,
        renderMode:'image'
    });

    setTimeout(showHeight,2000);
    function showHeight() {
        $.ajax({
            type: "GET",
            url: gisip+gisport+'geoserver/xcy/wfs?service=WFS&request=GetFeature&typeName='+polygonTypename+'&outputFormat=application%2Fjson',
            dataType:'json',
            success: function(data){
                var features=data.features;
                for(var i=0;i<features.length;i++)
                {
                    var feature=features[i];
                    var ft=new ol.Feature({
                        geometry:new ol.geom.MultiPolygon(feature.geometry.coordinates),
                        //attr:feature
                    });
                    ft.setId(feature.id);
                    ft.attr=feature;
                    var geometry=ft.getGeometry();
                    polygonVectorSource.addFeature(ft);
                }
            }

        });
    }
    var fill = new ol.style.Fill({
        color: '#dd942e'
    });
    var stroke = new ol.style.Stroke({
        color: '#cc1000',
        width: 1.25
    });
    function styleFunction(feature) {

        return new ol.style.Style({
            fill:fill,
            stroke:stroke,
            image:new ol.style.Circle({
                radius: 5,
                fill: new ol.style.Fill({
                    color: "#389BCD",
                    opacity: 0.5
                })
            })
        });
    }
    // map
    var map = new ol.Map({
        layers: [
            tilePolyline,
            polygonVectorLayer
        ],
        view:view,
        target: 'map',
        renderer:"canvas"
    });
    function  st(feature,isSelect) {
        return  new ol.style.Style({
            fill: fill,
            stroke: new ol.style.Stroke({
                color: '#319FD3',
                width: 1
            }),
            image:new ol.style.RegularShape({
                fill: fill,
                stroke: stroke,
                points: 3,
                radius: 10,
                //rotation: Math.PI / 4,
                angle: 0
            })
        });
    }

    /*********************************************************控件初始化**********************************************************/
    //添加
    $("#bt_print").click(function (e) {
        map.once('postcompose', function (event) {
            var canvas = event.context.canvas;
            if (navigator.msSaveBlob) {
                navigator.msSaveBlob(canvas.msToBlob(), 'map.png');
            } else {
                canvas.toBlob(function (blob) {
                    saveAs(blob, 'map.png');
                });
            }
        });
        map.renderSync();
    });


</script>
</body>
</html>
1、注意这里保存图片使用了saveAs函数,引用了外部的js文件
<script src="https://cdnjs.cloudflare.com/ajax/libs/FileSaver.js/1.3.3/FileSaver.min.js"></script>
2、在source中要添加crossOrigin,客户端跨域设置
    var tilePolyline = new ol.layer.Tile({
        //visible: false,
        source: new ol.source.TileWMS({
            url: 'http://localhost:8080/geoserver/whuxcy/wms',
            params: {'FORMAT': format,
                'VERSION': '1.1.1',
                tiled: true,
                "STYLES": '',
                "LAYERS": 'whuxcy:polyline'
                //"exceptions": 'application/vnd.ogc.se_inimage',
                //tilesOrigin: 8176078.237520734 + "," + 704818.0275364731
            },
            crossOrigin: 'anonymous'
        })
    });
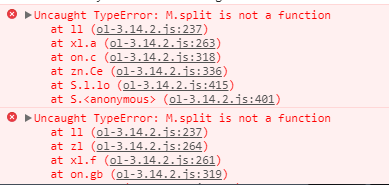
不添加的话会出现下面的错误

三、服务端跨域设置
当我们使用自己geoserver发布的wms服务的时候,使用上面的方法仍然没有成功保存地图,这是因为我们的服务端没有设置cors,如果想解决这个问题必须在服务端设置cors,可以考虑在geoserver中的web.xml中或者tomcat中的web.xml中配置添加如下:
<filter>
<filter-name>CorsFilter</filter-name>
<filter-class>org.apache.catalina.filters.CorsFilter</filter-class>
</filter>
<filter-mapping>
<filter-name>CorsFilter</filter-name>
<url-pattern>/*</url-pattern>
</filter-mapping>
这样的话就可以从根本上解决跨域问题了。
四、总结
- 地图打印实现;
- 服务端跨域设置,客户端跨域设置;
转载自:https://blog.csdn.net/xcymorningsun/article/details/84859374


