proj4.8编译
by giser · 2019-04-19
一、编译PROJ4
PROJ4的最新版本是4.8,官网地址为:http://trac.osgeo.org/proj/。从官网下载PROJ4的源代码,解压到文件夹中,如F:\Work\3rdPart\proj-4.8.0。
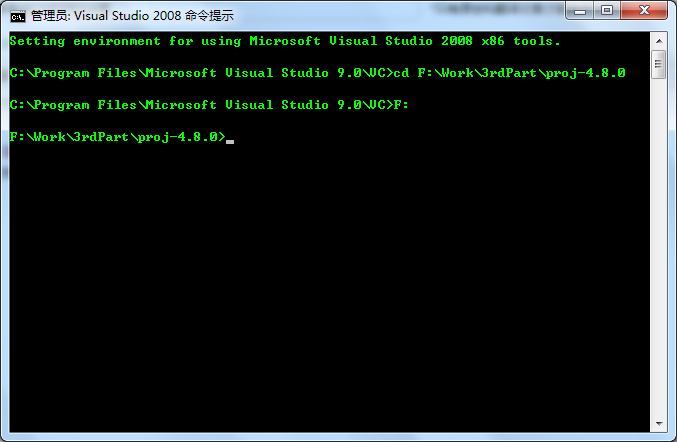
打开VS2008的命令行工具,然后将其工作目录切换到F:\Work\3rdPart\proj-4.8.0,如下图所示:

如果不进行输出目录设置的话,就直接在命令行中依次输入下面的命令回车即可:
nmake /f makefile.vc install-all
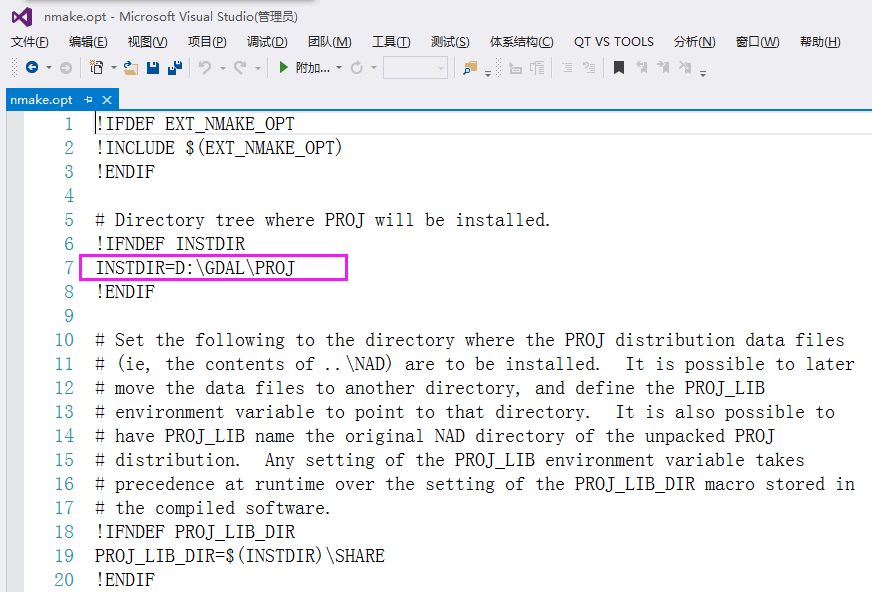
等待编译完成后,会默认值C盘的根目录下,创建PROJ文件夹,里面有四个文件夹,分别是bin,lib,include以及share四个文件夹,其中include和lib是用来做二次开发使用,bin存放的是dll和exe文件,share里面存储的是PROJ4所定义的一些投影文件等,在发布程序的时候,share文件夹需要一同进行发布,否则在做投影转换的时候可能因为找不到其中的文件而导致转换失败。
在有的时候需要调试PROJ4的源代码,那么需要编译DEBUG版本,编译DEBUG版本和RELEASE版本一样,只不过在是最后输入命令的时候,在后面加上DEBUG=1即可,完整命令如下:
nmake /f makefile.vc clean
nmake /f makefile.vc install-all DEBUG=1
等编译结束后,将src目录下的pdb等调试文件拷贝到你自己的工程输出目录中即可。nmake /f makefile.vc clean,这句的目的是为了清理之前编译生成的临时文件,如果之前没有编译过,可以不用。
有时候需要在64位系统上运行,为了高效,需要编译X64的版本,编译X64的版本和上面的基本一样,只不过是在打开VS2008的命令行的时候,要使用X64兼容工具命令提示,如下图所示:

目前GEOS的最新版本是3.3.2,官网地址是:http://trac.osgeo.org/geos/。从官网下载GEOS的源代码,解压到文件夹中,如F:\Work\3rdPart\geos-3.3.2。
编译过程和上面的PROJ4基本一致,只不过在执行nmake之前,有点小区别。打开VS2008的命令行工具,然后将其工作目录切换到F:\Work\3rdPart\geos-3.3.2,首先要执行一下,autogen,bat,然后再进行编译,如下图所示:

命令如下:
atuogen.bat
nmake /f makefile.vc src_dir
注意,上面截图的时候,后面的命令行敲错了,之前3.2.2版本是source_dir,在3.3.2版本,改为了src_dir。在编译3.3.2版本时,提示一个错误,log函数参数不匹配,用记事本打开F:\Work\3rdPart\geos-3.3.2\src\operation\buffer\BufferOp.cpp,找到第97行处的log(10),将log(10)改为log(10.0),保存,然后重新nmake即可。修改后的代码如下,修改的部分在第17行标注:
[cpp] view plaincopyprint?
<span style=”color: rgb(0, 0, 153);”>/*private*/
double
BufferOp::precisionScaleFactor(const Geometry *g,
double distance,
int maxPrecisionDigits)
{
const Envelope *env=g->getEnvelopeInternal();
double envMax = std::max(
std::max(fabs(env->getMaxX()), fabs(env->getMinX())),
std::max(fabs(env->getMaxY()), fabs(env->getMinY()))
);
double expandByDistance = distance > 0.0 ? distance : 0.0;
double bufEnvMax = envMax + 2 * expandByDistance;
// the smallest power of 10 greater than the buffer envelope
int bufEnvPrecisionDigits = (int) (std::log(bufEnvMax) / std::log(10.0) + 1.0);
int minUnitLog10 = maxPrecisionDigits – bufEnvPrecisionDigits;
double scaleFactor = std::pow(10.0, minUnitLog10);
return scaleFactor;
}</span>
/*private*/
double
BufferOp::precisionScaleFactor(const Geometry *g,
	double distance,
	int maxPrecisionDigits)
{
  const Envelope *env=g->getEnvelopeInternal();
  double envMax = std::max(
    std::max(fabs(env->getMaxX()), fabs(env->getMinX())),
    std::max(fabs(env->getMaxY()), fabs(env->getMinY()))
  );

  double expandByDistance = distance > 0.0 ? distance : 0.0;
  double bufEnvMax = envMax + 2 * expandByDistance;

  // the smallest power of 10 greater than the buffer envelope
  int bufEnvPrecisionDigits = (int) (std::log(bufEnvMax) / std::log(10.0) + 1.0);
  int minUnitLog10 = maxPrecisionDigits - bufEnvPrecisionDigits;

  double scaleFactor = std::pow(10.0, minUnitLog10);

  return scaleFactor;
}
2、编译DEBUG版本
在编译DEBUG版本和RELEASE版本一样,只不过在是最后输入命令的时候,在后面加上DEBUG=1即可,完整命令如下:
atuogen.bat
nmake /f makefile.vc clean
nmake /f makefile.vc src_dir DEBUG=1
等编译结束后,将src目录下的pdb等调试文件拷贝到你自己的工程输出目录中即可。同样,nmake /f makefile.vc clean,这句的目的是为了清理之前编译生成的临时文件,如果之前没有编译过,可以不用。
编译X64的版本和编译PROJ4的X64一样,只不过是输入的命令不同而已。
转载自:https://blog.csdn.net/jiangbingbo123/article/details/51058310


