【地图整饰】ArcMap添加图框及ArcEngine实现
目录
一、ArcMap添加图框
该部分学习引用:http://max.book118.com/html/2017/0531/110577194.shtm
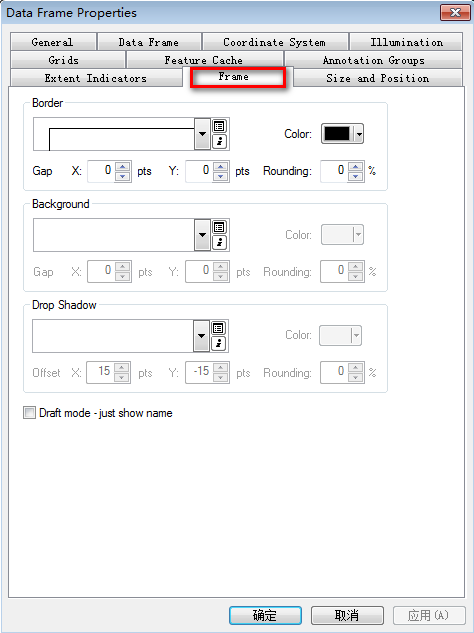
1、View –> Data Frame Properties –> Frame
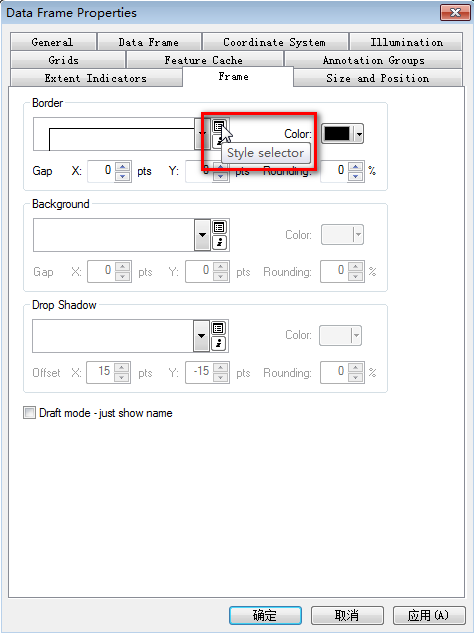
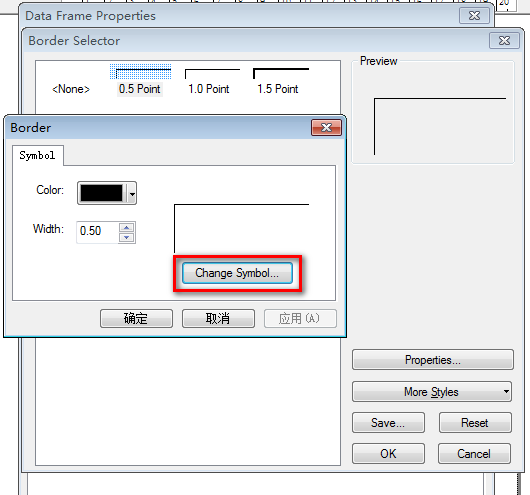
2、点击 Border 旁边的 Style selector 选择图框样式
3、选择好样式后,点击Properties可以调整该图框的颜色和粗细。


4、点击确定即完成简单线型图框的制作。
5、如果想要制作花边图框,则在 Border 中点击 Change Symbol。
6、在Symbol Selector对话框中单击Edit Symbol按钮,打开Symbol Property Editor对话框,在Type下拉列表中选择Marker Line Symbol 。

7、单击Mark Line选项卡,点击Symbol按钮弹出Symbol Selector对话框,单击Edit Symbol。
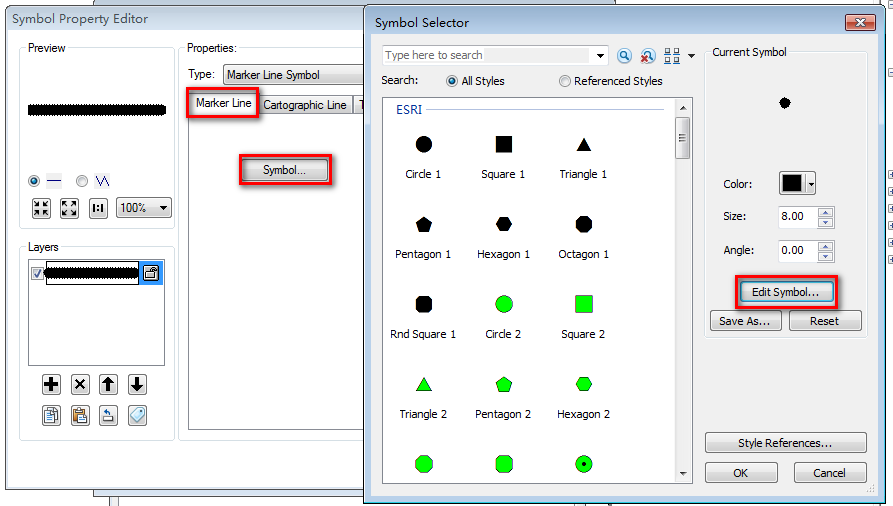
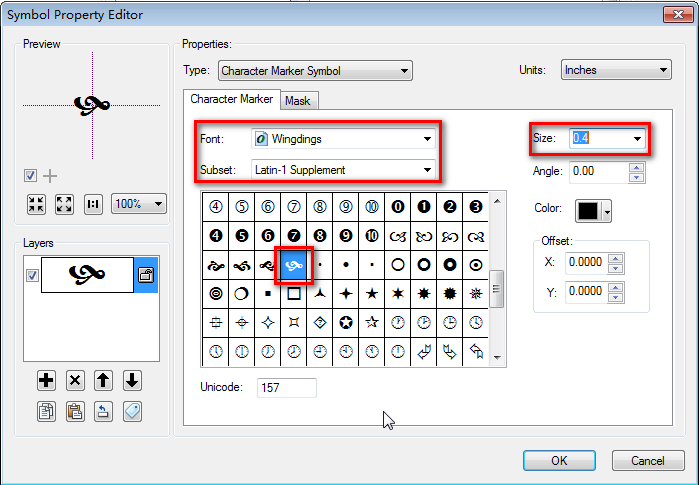
8、选择Character Marker Symbol。

9、在Font下拉列表中选择Wingdings,在符号窗口选择需要的花边符号,左侧设置符号大小和旋转角度。单击OK返回Symbol Property Editor。
10、选择Template选项卡,拖动滑块调整符号间隔

11、点击Layers下方的“+”,添加一个新的Cartographic Line Symbol符号。

12、选中线符号,打开Line Properties选项卡,调整Offset偏移量,线即跑到上面了。

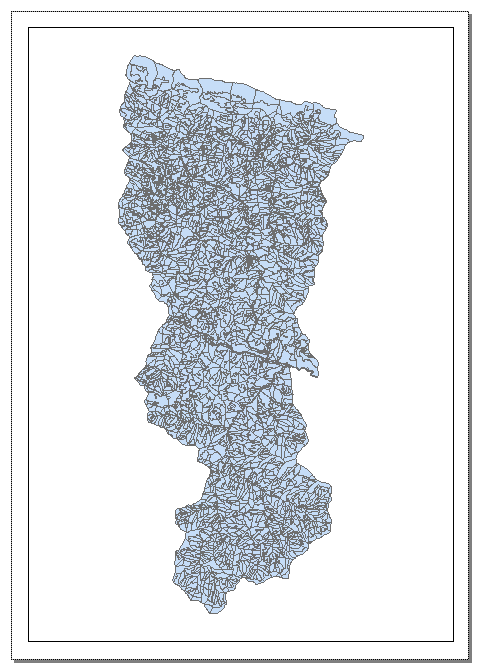
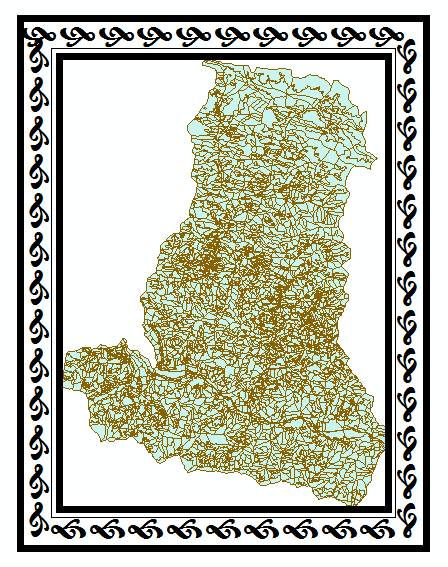
13、将编辑好的符号保存到自己的符号库中,便于开发中使用。完成效果如图。不知道为什么缩小后图框的花边符号间隙变大。放大后就没有问题。此问题待解决。欢迎大神留言指正。

缩小 VS 放大

二、ArcEngine实现图框
实在是没找到官方的方法,所以走了个野路子,很简单就是在map上画一个线元素。
具体代码实现如下:
        /// <summary>
        /// 绘制图框
        /// </summary>
        /// <param name="axMapControl">Map控件</param>
        public void CreateNeatline(AxMapControl axMapControl)
        {
            //创建线元素
            IElement neatlineElement = new LineElementClass();
            neatlineElement.Geometry = GeoFactory.CreateObject().EnvelopeToLine(axMapControl.FullExtent);

            //从符号库中获取图框的符号
            ISymbol pLineSymbol = SymbolFactory.CreateObject().GetSymbolfromSytleFile(@"C:\Users\admin\Desktop\workspace\data\符号库\fh.style", "Line Symbols", "图框");
            (neatlineElement as ILineElement).Symbol = pLineSymbol as ILineSymbol;

            //将线元素添加到地图中
            IGraphicsContainer container = axMapControl.Map as IGraphicsContainer;
            container.AddElement(neatlineElement, 0);

            //刷新地图
            IActiveView activeView = axMapControl.Map as IActiveView;
            activeView.PartialRefresh(esriViewDrawPhase.esriViewGraphics, null, null);
        }
运行效果如下:
转载自:https://mtr-1.oss-cn-beijing.aliyuncs.com/qyblog/2019/04/73247001.jpg